🌱 ManaKai Prototype: Getting Started Guide
Goal: Build a basic ManaKai seed prototype for under £500 to test frequency response, UV conversion, and growth patterns.
⚠️ Before You Start
This guide is for controlled laboratory testing only. Do not release into the environment. ManaKai is designed with built-in decay mechanisms, but untested biological systems require careful containment.
💰 Equipment Cost Breakdown
🔬 ESSENTIAL EQUIPMENT
Fungal Culture Setup
- Pleurotus ostreatus or Ganoderma lucidum culture: £15-25
- Autoclaved volcanic substrate (pumice, basalt sand): £20-30
- Growth containers with humidity control: £30-50
- Basic microscope (400x minimum): £80-150
Subtotal: £145-255
📡 Frequency & UV System
Signal Generation
- Function generator (432/528 Hz capable): £60-100
- UV-A/UV-B LED panel (2.5 µW/cm²+): £40-80
- Frequency amplifier/speakers: £30-60
- EM field meter (optional): £50-100
Subtotal: £180-340
🧪 Measurement & Analysis
Data Collection
- Digital camera with macro lens: £100-200
- pH/EC meter: £30-60
- Thermal hygrometer: £20-40
- UV light meter: £40-80
Subtotal: £190-380
🎯 MINIMUM VIABLE PROTOTYPE
Essential Equipment Only: £325-595
With basic measurement tools: £515-975
🛠️ Step-by-Step Construction
Step 1: Prepare the Mycelial Matrix (Week 1)
Inoculate fungal spawn into sterilized volcanic substrate. Maintain 20-25°C, high humidity, darkness for 5-10 days.
Success indicator: White mycelial growth visible throughout substrate
Step 2: Form the Seed Matrix (Week 2)
Harvest mycelial layer, dehydrate, and compress into 3-7cm discs. Apply mineral coating (basalt/granite fines).
Key: Mineral interface must be evenly distributed for resonance testing
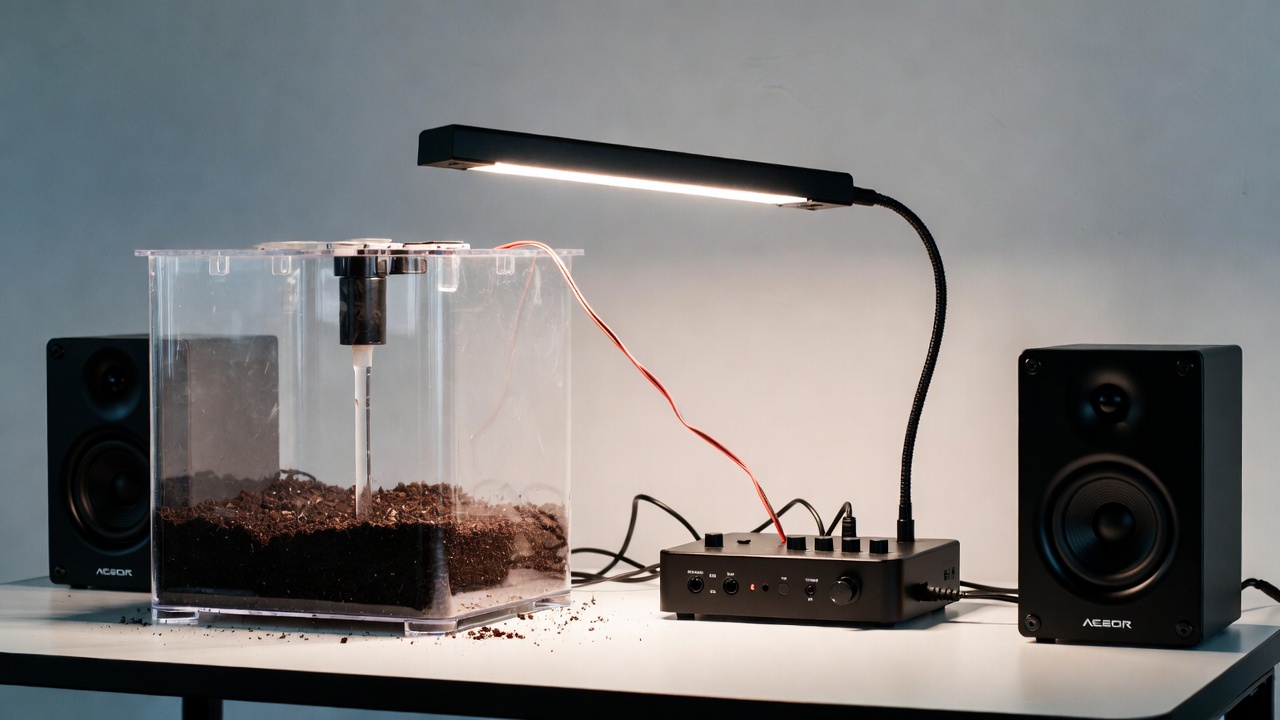
Step 3: Set Up Test Environment (Week 3)
Prepare controlled chamber with: 8-12% substrate moisture, frequency generator at 432 Hz, UV-A/B lighting ≥2.5 µW/cm².
Critical: All parameters must be measurable and loggable
Step 4: Activation Testing (Week 4)
Place seed in test environment. Apply frequency input ≥3 hours/day. Monitor for growth initiation (should see within 7-14 days if conditions met).
Document: Time to first visible growth, growth rate, any fluorescence
Step 5: Fatigue & Decay Testing (Weeks 6-8)
Remove frequency/UV inputs. Monitor for propagation decay and dormancy as predicted by your equation.
Validation: System should self-limit without reinforcement
📊 What Success Looks Like
✅ Positive Results
- Frequency Response: Growth rate significantly higher at 432/528 Hz vs control
- UV Conversion: Measurable fluorescence and enhanced growth under UV
- Self-Limiting: Growth decay when reinforcement removed
- Mineral Response: Growth patterns vary with substrate composition
❌ Negative Results (Still Valid)
- No frequency response → frequency mechanism needs revision
- No UV effect → wavelength-shifting hypothesis incorrect
- No self-limiting → decay equation parameters need adjustment
Either way, you get data to refine the model
🚀 Scaling Up (If Basic Tests Succeed)
Phase 2: Controlled Environment Farming
Larger growth chambers, multiple seed matrices, environmental monitoring systems
Additional Cost: £2,000-5,000
Phase 3: Field Trials
Greenhouse deployment, soil testing, nutrient analysis, harvest validation
Additional Cost: £10,000-25,000
🔬 Safety & Ethics Protocol
- Containment: All tests in controlled environment only
- Monitoring: Daily observation for unexpected behavior
- Disposal: Autoclave or incinerate all biological material
- Documentation: Full lab notes, photos, measurements
- Open Source: Share all results (positive and negative)
💡 Bottom Line
Starting cost: £325-595 for a basic prototype that can validate core hypotheses.
This is absolutely doable as a serious research project.
Next steps:
- Secure small grant or crowdfunding for equipment
- Partner with university lab for access to microscope/measurement tools
- Document everything and publish results open-source
- Iterate based on data
"The simulations demonstrate mathematical consistency. Now let's see if nature agrees."